The lighting angle
Introduction
Präkel (2007, p120) notes that the direction from which light falls on to a subject has a major impact on the viewers ‘reading’ of the image. This exercise will help to illustrate this as we look at the effects of moving the lighting angle. The instructions are as follows-
- Select a subject. It should be no bigger than the diffuser in front of the light. It should be rounded and have a variety of planes to show areas of light and shadow.
- Position the subject on a small level surface with a plain background.
- Fix the camera onto a tripod and aim it at the subject.
- Fit the light with a diffuser and move it around the subject taking
 with the light in front of the camera, from the side, from behind and to one side and from directly behind.
 - Raise the light so that it point to the subject at angle of approximately 45 degrees. Again, move the light around the subject.
- Suspend the light above the subject, pointed down. Take three pictures: directly overhead, slightly in front and from slightly behind.
- Study the photographs to note the effect the lighting position has on showing the subject’s shape and form.
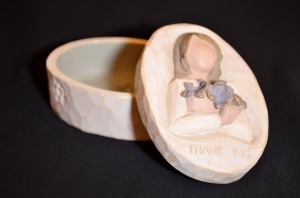
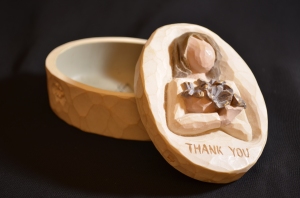
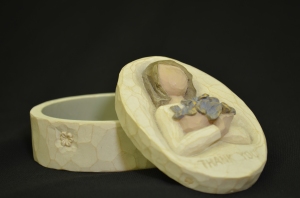
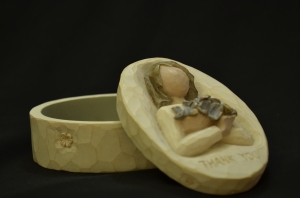
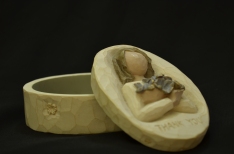
I selected a small trinket box as the subject for this exercise as it met the criteria in terms of shape and size. I used a speed light as the light source and placed it on a stand to be triggered wirelessly from my camera. I also closed the curtains in the room to minimise light from sources other than the speed light. As I was working in low light and long exposure times I used a shutter release cable.
Light level with subject
Front
Präkel (2007, p158) notes that when light falls directly flat onto a subject very little texture will be revealed. This can be seen here. The frontal lighting has made the image very low contrast. There are no shaded areas to be seen on the carved box lid making it appear flat and 2-dimensional.
Side
- 55mm, f.5.6, 10s, ISO 125
Präkel (2007, p158) advises that side lighting is effective for emphasising texture in an object as the light skims over the surface showing the micro contrasts. Side lighting has done this here by showing areas of shadow and highlight and modelling the subject’s surface.
Behind and to one side
There is quite a lot of highlight on the lid surface that contrasts with the areas of shade on the underside of the lid and the left side of the face and arms. The lighting behind and to one side has caused a large shadow to fall around the left side of the box. Präkel (2007, p157) states that a cast shadow is helpful in revealing form as the shadow anchors a solid object on a plane and enhances the illusion of three dimensions on a two-dimensional page
Behind
I spent quite some time on this part of the exercise adjusting the flash’s power and experimenting with exposure compensation while attempting to capture a silhouette without clipping any highlights or shadows. I changed the background to white to enable the shape of the subject to be seen.
There are still some details visible in the silhouette, despite my best efforts. I have since read on several photography websites (http://digital-photography-school.com/how-to-photograph-silhouettes and http://photofocus.com/2013/08/09/how-to-photograph-a-silhouette/) that when trying to take a silhouette photograph it is better to expose for the background. So perhaps this is where I was going wrong? However it is clear that back lighting is effective at showing shape, although I quickly realised that the side-on view of the box was not a very distinctive shape and that the shallow depth of field has rendered some of the outline a little fuzzy. I tried this again with a slightly different arrangement to show the oval shape of the box.
This is another photograph of light coming from behind the subject, however this time the camera is not looking towards it. It has created a rim of light around the top edge of the trinket box, which also helps to show its shape.
There also seems to be a pink/orange tone to this image that I wasn’t aware of at the time of shooting.
- Behind 3
55mm, f/5.6, 10s, ISO 125
Out of the four possible lighting scenarios I think Side lighting and Behind 3 gave the best results for this subject. They both gave the subject areas of shadow and highlight which helps give a photograph a 3 dimensional appearance.
Light pointing down at 45 degrees
Front
This is fairly low contrast with no real areas of dark shadow or bright highlights.
Side
With the light hitting the subject from the right a few areas of highlight can be seen reflected in the lid. The side lighting helps to emphasis the textures of the carving and it appears more pronounced.
Behind and to one side
The highlights are brighter here and draw the eye. There is also a shadow on the underside of the figures arms and under the flowers. These help reveal the object’s 3 dimensional quality.
Behind
The areas of bright reflection have now gone. The areas of shadow are more defined around the head, on the flowers, under the arms and in the box. The front of the box is in shade and this allows the texture and pattern on the box to be seen. Of these four image this is the one I prefer as the shadows have modelled the box well and also the colours seem less yellow and have more of a brown/pink tint.
Light above
Directly overhead
The light above has resulted in only a little bit of shadow to be seen below the lid. As the lid is sitting at an angle the light above has still provided some shade under the chin, flowers and arms. The front side of the box and left rim of the lid are in shade, which has helped to reveal the texture, which is all but lost in the highlighted areas.
Above, but slightly in front
The angle of light has meant that it has managed to fill a lot of the shadows on the lid and make the contrast quite low. The colours appear very pale and the foreground is quite bright.
Above, but slightly behind
The light has shown up a few areas of highlight on the face, shoulders and on the top of the lid. This contrasts with the shadows and helps reveal the form on the lid.
I think of these three lighting positions above and slightly behind worked best for this subject as it revealed both highlight and shadow and helped to strengthen the solidity of the object.
Conclusions
This exercise has illustrated that the angle and direction of light have a strong influence on how the end image is viewed and to what degree a subject’s qualities are revealed.
Front lighting did little to show the texture of the trinket box in any of the set ups I used and made the image look quite flat. However I do wonder if this would be the case for all subjects? Perhaps a lighting set up that minimizes texture would be good for portrait work?
Back lighting, comes from behind the subject towards the camera was good for revealing an objects shape, although, as I found out when attempting this, gauging a suitable exposure was difficult.
Side lighting is effective for emphasising texture however if there is a grain to the texture, the light should be used across the grain to show this.
Overall, I think the exercise was valuable in showing some of the creative options available using only one light and varying its position and angles. This can be seen in the thumbnails below.
Präkel, D. (2007) Lighting. Lausanne: AVA
http://digital-photography-school.com/how-to-photograph-silhouettes
http://photofocus.com/2013/08/09/how-to-photograph-a-silhouette/
